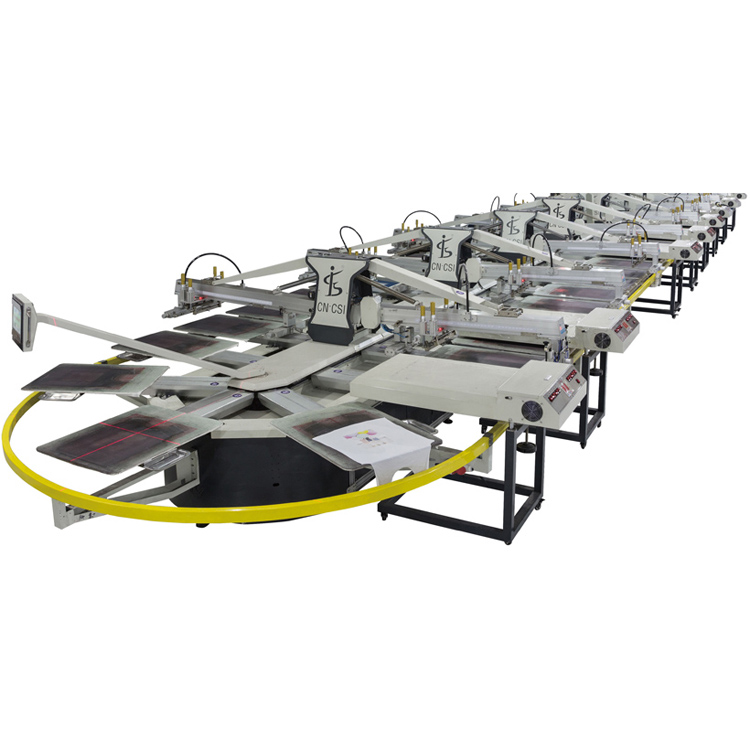
Last few weeks, my friend learned how to do screen printing at the exhibition. He had only heard about it before, but he did it once. Although there were many preparation steps, he found it very tiring and interesting. You can also make silk screen printing at home. screen printing. This article Silk screen printing machines manufacturer tells you 【screen printing operation tutorial】 how to screen print at home.
【1】Build screen and frame
1. Purchase a canvas stretcher at a craft or art supply store.
These are basic, inexpensive wooden frames used to mount canvases. For a little more money, you can buy an aluminum frame that will last longer, since repeated washing can warp the wooden canvas.
Many art stores now also sell pre-made screen prints, so if you don't want to make custom screen prints, you can buy standard screen prints.
Make sure your frame is large enough to fit your design. Choose at least 12x18" if you don't know your design yet, or want a versatile frame that works with multiple designs.
2. Purchase your grid.
You want a nice, fine mesh that will allow the ink to penetrate the shirt, paper, or design. The grid number measures the tightness of the grid, and the larger the number, the tighter the grid. The tighter the mesh, the more intricate your details will be. Mesh is the number of threads per square inch.
For classic "sport" or varsity prints that look worn/spotted, aim for a loose 85 mesh.
For an "all-around" grid, aim for a 110-130 grid count.
For printing on paper or plastic, choose a mesh count closer to 200-250.
In general, lighter-colored objects work best with higher mesh counts. So if you're doing a white paper, aim for 230-250.
3. Staple the grid into the frame.
Make sure to pull the screen taut before you start stapling. You want it to be as taut as possible without tearing. Stretch the mesh over the frame and staple every 1 to 2 inches (2.54 to 5.08 cm) around the wood.
You may need an electric staple gun to adhere to the grid securely.
You can also use framing nails.
【2】Elaborate design
1. Create your design template.
Screen printing can only apply one color at a time, so create a simple shape or outline to get started. Whatever you draw will end up being the inked part of the print. To make your printouts you will need:
Poster board, cardboard, or other thick paper.
pencil
other precision knives
2. Understand the artistic limitations and challenges of screen printing design.
Silk screen printing machines manufacturer tell you, Screen printing is not difficult because what you paint is exactly what you get on the final print. However, when designing your print, you should be aware of certain principles and limitations of screen printing:
You can only print one color at a time.
High-contrast images, such as black text on a white background, work best because you can't use shadows.
For intricate designs, you'll need to print multiple times, one for each color, and layer them after the ink dries.
3. Sketch your design onto a poster board.
Outline your design blocks. You can also upload photos or other images into photo editing software and use them. To do this, reduce the drawing to a basic two-tone outline, then print it.
For example, to make a template in Photoshop, you can take a black and white image and click Image → Adjustments → Threshold and set it close to the highest value.
4. Cut out the design as a template.
Everything you cut out won't be inked on the final print, and everything covered by the stencil will be covered in ink. For example, say you're printing a bull's-eye red logo on a white T-shirt. When you cut out the template, all the rings you cut out will be white, and all the rings covered by the template will be red.
5. Alternatively, draw your design on transparent paper.
Silk screen printing machines manufacturer tell you, For complex prints, it may be difficult to cut out the entire outline. In this case, use thick black ink on transparent paper to create a stencil.
Your stencil or drawing needs to block the light as this is what etches the design onto the screen and allows you to print it. The stencil or everything covered by the black ink is not exposed to light, allowing it to "open up" and allow the ink to transfer to the shirt or item.
【3】Print with your screen
1. Apply a thin layer of photosensitive emulsion on the screen.
Pour a bead of emulsion along one side of the screen, then use the squeegee to spread a thin line across the screen. Emulsions react to light and harden when exposed, so anything not covered by the stencil becomes a barrier to ink passage.
Apply the lotion to the flat side of the frame, not the side surrounded by wood.
Do this in as dark a room as possible to prevent the lotion from hardening before you're ready.
2. Let the lotion dry in a dark space.
Expose it to as little light as possible. A closet or bathroom will work well as long as you can draw some curtains.
3. Set the "exposure area" while waiting for the lotion to dry.
You need to expose the lotion directly to bright light for preparation. Set up a light above a flat black surface following the specifications on the lotion bottle in the photo. Each lotion has different times, wattages, and distances needed to harden properly, so be sure to read the bottle before starting. The light should always be 1-2 feet above the lotion.
If the lotion takes 30 minutes at 200 watts, install a lamp with a 200-watt bulb 1-2 feet above the table. The screen moves under the lights.
4. Place the screen under the light of the exposure area.
When you move the screen, cover it with a towel so it doesn't react to incoming light. Put it under the light on the platform you're on, and put the towel on it temporarily.
5. Place the template backward in the middle of the screen.
Silk screen printing machines manufacturer tell you, The screen should be emulsion side up. The grid will be lifted a few inches off the table and placed on the frame. Place the template in the middle of the screen with 4-5 inches of space between the design and the edge of the frame.
You have to reverse the template to get the correct image. View the template the way you want it, then flip it over before putting it down. Otherwise, you'll get a mirror image when you start printing.
If there is a breeze, or your form is light, put a piece of clear glass on top to keep it from moving.
Do not push, poke, or move a screen, light, or template after it has been placed and set up.
6. Turn on the lights for the recommended hours.
Just follow the directions on the lotion bottle and remove the screen when you're done. When you're done, remove the template and set it aside for later use. If you smell any burning odors during this process, turn off the lights immediately.
If you prepared the emulsion properly, you should see the blurred outline of the template in the emulsion when the design is removed.
7. Rinse off the lotion with cold water.
Use any high-powered water source (shower, faucet, hose) to rinse the screen and focus on your image. Water will wash away unhardened emulsion around the design. You should see the outline of the template appear. Keep spraying until you can see your image.
Let the screen dry before proceeding to the next step.
8. Align the screen above the object to be printed.
The grid should touch whatever you're printing on, like paper or a shirt.
If you're using a shirt, slide some cardboard between the layers of the shirt to keep the ink from bleeding.
9. Scrape some ink on your design.
Draw a thin line above your design. Then firmly drag the squeegee over your design to ink the entire stencil.
The harder you press, the darker your image will be.
10. Slowly pull off your screen print.
Pull the screen off the t-shirt/paper with even pressure, then hang the shirt up to dry. Your design will be printed.
11. Repeat this for any number of shirts, cleaning the screen occasionally.
You can reuse your screen print on another t-shirt if desired, adding more ink if necessary. Simply wipe the back and reapply the ink after each shirt. If you use the same print for several days in a row, rinse and dry at the end of each day.
Screen printing (sometimes called screen printing, or screen printing) is a wonderful artistic technique that is especially useful for printing onto materials. The process is simple, versatile, and relatively inexpensive, so everyone should try it!