
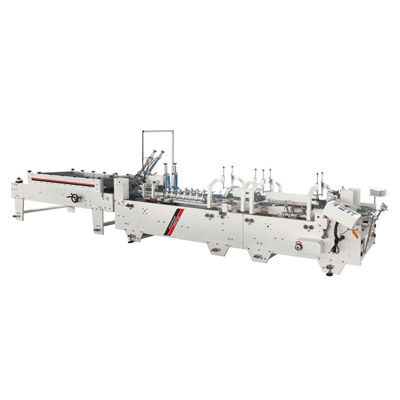


1. Product use scope:
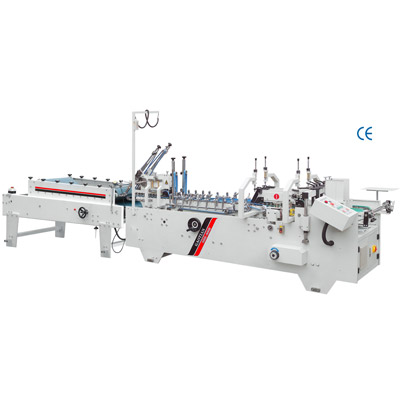
This machine is specially used for paperboard shaping and adhesive processing after cutting horizontally. Its universality is strong and suitable scope is wide, which can fold and paste various straight seaming box and bottom edging box.
2. Main technical parameter:
Main technical prameter
SHH-800B
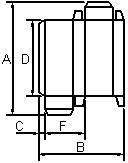
| Type of box | (Amax) | (Amin) | (Bmax) | (Bmin) | (Cmin) | (Dmin) | (Fmin) |
| box | 700mm | 70mm | 600mm | 110mm | 8mm | 70mm | 51mm |
SHH-1200B
| Type of box | (Amax) | (Amin) | (Bmax) | (Bmin) | (Cmin) | (Dmin) | (Fmin) |
| box | 700mm | 70mm | 800mm | 110mm | 8mm | 70mm | 51mm |
Characteristics
| Linear velocity | 0~220m/min | |
| Suitable paper quality | 220~800g/m² cardpaper and E wave corrugated paper | |
| Paste box basic form | One-side edge pastes, two-side edge pastes. | |
| Feeding way | Automatically and continuously feeding | |
| Adhesive | Solute type | |
| Needed power | AC220V 3.5KW | |
| Weight | 1800KG | |
| Overall Size | 5500×850(1300)×1300mm | |
| The scope of Count | 0~999999 | |
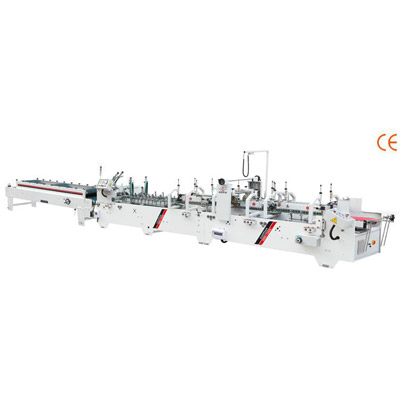
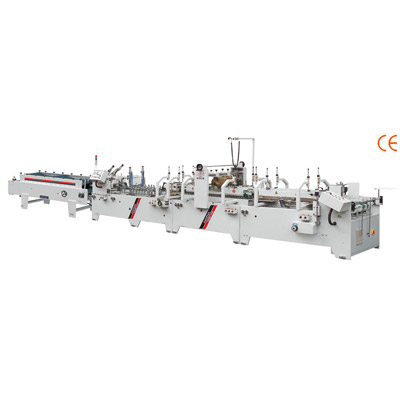
3. Working principle:
After starting the machine, the automatic paper feeding table will feed the paper sheets needed to be pasted out one by one continuously. The gluing device will automatically coat the glue on the adhesive position of paper box evenly. The glued paper sheets also will automatically send to the fold part. In the course of paper sheets ahead, the belt device of the fold part will automatically fold and stick the paper box. After finishing the fold and adhesion, send the paper box to the pressing part. After pressing, send it to the conveying part to be pressed firmly, finally send it to the paper receiving table. The whole working procedure is finished.
4. Working principle and adjusting method:
The fold of the paste box machine is folded and shaped according to the vein of paper box pressed trace. If the pressed trace is too shallow or the paper box is unaligned, the paste box machine can not fold the needed paper box, so before using the equipment, please carry out the check to the paper box sample plate. Take a sample plate to be held with hand slightly and then tighten the edge, have a check whether the pressed trace of the paper box is accurate. All unqualified pressed trace paper boxes are forbidden on this equipment.
(1) Paper feeding part
The paper feeding table is mainly in accordance with the paper sheet specification to adjust the distances between two gear paper plates, paper dividing gague position and paper out interval, make the paper convey successfully, steadily, not appear to any phenomenon of conveying double sheets, multi-sheets and no paper conveying. Adjustment method:
A. Adjust the distances between twp baffles according to the paper sheet width. First loosen the adjustable handle on the two baffles, put the paper sheets on the middle position of the paper sending table, move the two baffles approach towards the paper sheets, at the end adjust the two baffles and paper sheet both sides in parallel and remain a few space so as to let the paper sheets move in horizontal.
B. It’s necessary to carry out the adjustment to the paper dividing gague position according to the different size of the paper sheets needed to be pasted. In general the two paper dividing gague can be distributed evenly at the between of two baffles, the front and behind distances should be proper. When adjusting, only loosen the adjustable handle shown as Fig. 2, then move the slide block on the beam to left and right and paper dividing gague to front and behind, so as to make the paper dividing gague meet the desired position and then tighten the handle. Meanwhile, determine the conveying belt root number and make sure the paper sheets in level and tidy.
C. Adjust the interval δ between the paper dividing gague and conveying belt according to the paper sheet thickness. In general δ is the thickness of a piece paper. Adjustment method: Rotate the star-shape handwheel upward or downward, which can make the paper dividing gague move up and down so as to change the interval sizes.
(2) Adjustment of fold width
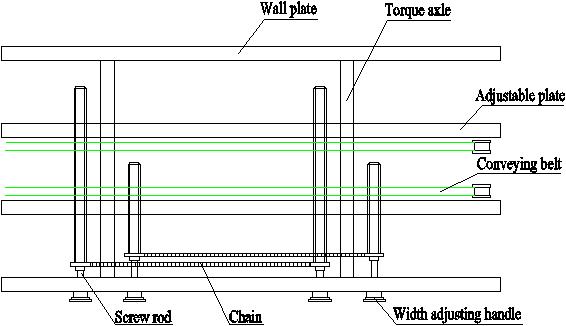
IV Schematic Diagram of fold part
Adjust the fold box width according to the width size of fold box paper sheet. Only need to rotate the handwheel according to the width shown as Fig. IV to make the screw rod rotate, because the front and behind screw rods are connected with the chain, the two main plates will move in parallel at the same time while rotating the handwheel. After the two main plates reach the desired fold box width, the start the machine to have a trial and carry out the detail adjustment to the various fold box wheel, conveying belt etc. Finally reach the purpose that the paper sheets can pass successfully and the fold box position can be correct and have an enough adhesive force.
(3) Gluing part
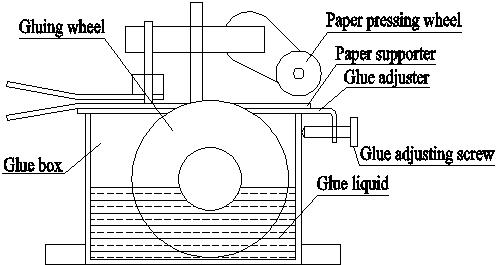
Fig. III Gluing mechanism
In the course of pasting box, the size of gluing amount and gluing position are key point. The gluing device should coat the glue liquid on the adhesive place of paper board evenly, finally make the paper box stick firmly. When adjusting, first as the paper sheet width and gluing position and then adjust the glue box to be stuck firmly. The glue box position can use the wrench to twist the screw on the glue box fixed plate to drive the glue box removal. The glue amount can be adjusted through the adjustable screw front and behind. The function of the paper pressed wheel is to prevent the paper sheets from bending upwards while gluing, paper sheets can not be touched with the gluing wheel and the glue can not coat on the paper sheets evenly. Rotate the adjustable screw to properly adjust the position of paper pressed wheel and the height, so that the glue liquid can be guaranteed to coat on the adhesive place of paper sheets.
(4) Fold part:
A. The loose or tight degrees of up and down, left and right of four fold belts should be identical. Two upper adjustable handles can adjust the two upper belts and two lower adjustable handles can adjust the two lower belts (they all can be adjusted separately).
B. Both side removal rows can be adjusted with the handwheel according to the paper box size. Adjust the both sides belt widths should be wider 1-2 mm than that of the folded box edge folded trace. The both widths of folded knife row should be less 1-2 mm than that of the paper box folded trace. The height between the folded knife and belt should be wider and loose a little that the thickness of a piece of paper. The upper and lower, front and behind of the folded knife rows all have the adjustment part, which can be fixed on the removal rows, thus it’s unnecessary to adjust the knife rows to the paper boxes which thicknesses are not differ too much.
C. The back wheel outside the belt and the natural curve of folded belt should be coincided and not be approached too tight. When the paper box walks to the bend part, it can not bend too strong. Adjust the belt with the back wheel till the natural curve as the paper box pressed trace line. The paper boxes all enter the folded tape, the behind both pressed wheels will clamp the both sides of the paper boxes and then the paper boxes will be shaped. Following enter the press part.
(5) Adjustment of conveying part:
The conveying part mainly consists of two wide belts and one row of roller. There are handlwheels on the roller which can adjust the pressure (they are mounted on the removal frame separately). They mainly can adjust the pressure to the boxes. The upper belt can remove front and behind with the frame, which can take composition to the long box or short box. The conveying part can press the folded paper boxes in the middle of the belt and then send it to the rear collection part, make the paper boxes stick well which can be baled and left the factory (see the picture 8).
VI. Control panel
In the fold and convey part, this machine equips with the limit switch (need to be adjusted as the different specification), which can make the whole machine stop running automatically while the box pasting machine occurs to breakdowns. This time, you can not open the machine and only can start it after it recovers in normal, so as to decrease the waste rate.
The electric panel is equipped with the counter, which can provide the operator with accurate data.
The front, middle and behind of the equipment all have been equipped with the stop switch. Once the equipment occurs to problem, the working personnel can control the emergency stop namely the front motor switch, middle protection switch and behind stop switch at any position.
The equipment is also equipped with the wire inching switch, which can bring convenience for testing the paper box. When using, close the main motor switch on the panel. The vibrator also has a button switch, but It’s controlled by the paper feeding part, because the paper feeder does not open, it’s no meaning to open the vibrator.
In general, turn on or turn off the general power, first turn off the main motor switch, otherwise, the frequency converter will cause a great impact and easily damage the equipment. Please do remember it.
5. Transport and installation:
(1) Transport
After users receive the machine, they must carefully disassemble the machine to check. During transport, pay close attention to the focus position, possibly avoid the machine appearance paint from scraping and shocking.
A. The electric wire circuit should be checked by three-level electrician at least. The working power is 220V, 50Hz, the machine body is connected with the ground safely.
B. Check whether the various screws are fastened or not. Add the lubricant
(2) Installation:
A. This machine should be set on the concrete base, the installing ground should be flat and plain, there remain enough operating sites all around.
B. When installing, make the machine be at the level state.
(3) Make the main machine and the flat part central line be at the same straight line.
6. Lubrication
(1) Before working every day, pour 30# machine oil and lubricating greasy to various lubricating points.
(2) All the parts, screw rod and guide plate, which are not used frequently, should be lubricated once half month.
7. Machine maintenance
(1) Before working, carry out the clean work to the machine and remove the odds on the machine. After working, keep the machine clean and tidy.
(2) Clean the glue box and then get off work.
(3) Add the lubricant to the all running axle, chain and between chains and keep them good in lubrication.
(4) Keep the surface of four belts clean. During working, if finding any oil ink or glue to stick the belt surface, rub and clean them in time.
(5) Before starting the power or closing the machine, keep the rotary switch in the electric panel to be at the close position, otherwise it will produce impact or damage the converter while starting the machine.
(6) Close the counter power switch while getting off work. Do not dial out the power plug before closing the counter power switch, otherwise it will cause the counter internal battery over and discharge and damage the machine.
Electrical configuration
VIII. Breakdown and shooting method
| Breakdown | Reason | Shooting method |
| The power indicating lamp is not on, not run | The fuse is broken | Replace the fuse |
| Not run, the display screen does not display | ||
| Not run, the display screen displays “breakdown” | Refer to “Converter manual” | Press the breakdown reset button, refer to “converter manual” |
| Not count, counting not correct | Dust or correct is incorrect | Clean or adjust |
| Paper feeding is abnormal | The paper dividing interval δ is improper or position is improper | Adjust the front gague or baffle |
| Glue coating is uneven | The gluing wheel is incorrect | Adjust the gluing device |
| Page folding is incorrect | The fold page width size is improper | Adjust the fold page width size |
| Blocked deadly between the paper sheet and fold page | The interval of left and right, up and down of the fold page plate is improper | Adjust the interval of the fold page plate |
